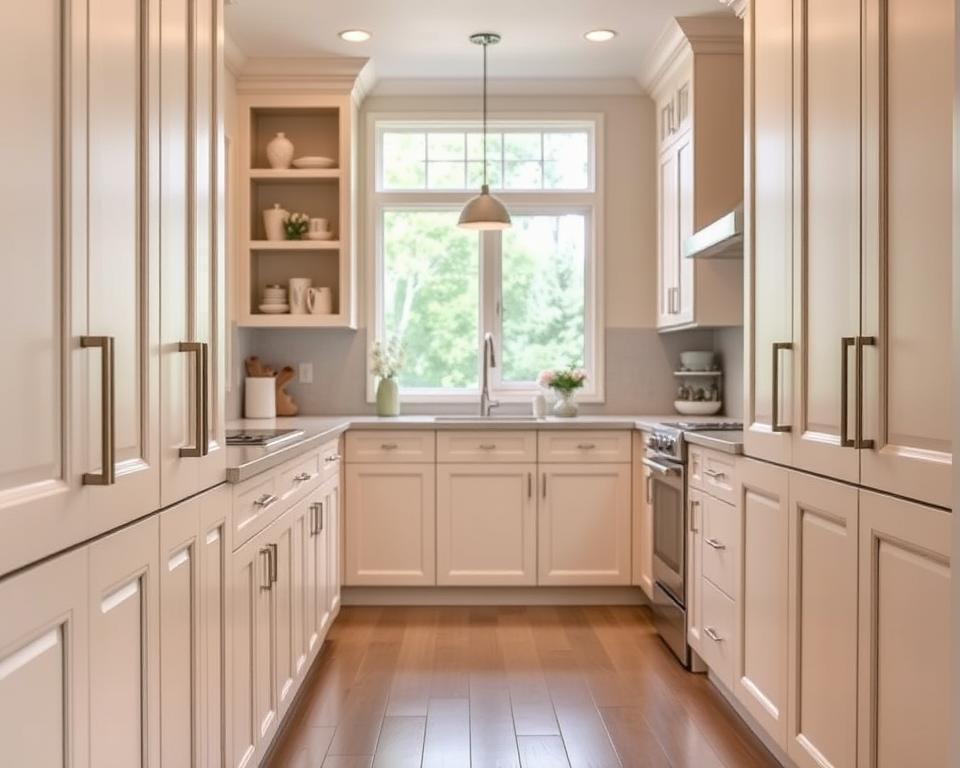
Updating your kitchen doesn’t mean a full kitchen renovation. Refinishing your cabinets is smarter. It gives you polished surfaces and new designs without tearing things down. Old oak cabinets or faded finishes can become modern with simple painting or new hardware.
This method is cheaper, often 50% less than buying new. It turns old wood into valuable space that adds style and value to your home.
Refinishing your kitchen saves time too. Professionals can finish in 5–7 weeks, with most work done in just 2–5 days. You can choose styles like high-gloss to cut cleaning time by 30% or add undercabinet lighting for $100–$300 for a big impact.
Even a DIY paint job for $200–$600 can make a big difference in a weekend.
Key Takeaways
Kitchen cabinet refinishing costs up to 50% less than full replacement.
Professionals complete projects in 5–7 weeks, with minimal in-home disruption.
DIY options like painting start at $200, giving you instant style upgrades.
Custom finishes like Thermofoil and wood veneer let you match any kitchen style.
Refinishing boosts home value with a 70% average ROI upon resale.
Learning about the psychology of kitchen cabinet colors to improve your property.
Refinishing is great for a budget-friendly kitchen upgrade or eco-friendly remodeling. It reduces waste and makes a big impact. See how it can transform old cabinets into functional, stylish spaces without the cost of a full kitchen renovation.
Why Refinishing Kitchen Cabinets Makes Sense in Today’s Economy
Refinishing kitchen cabinets with professional like the ones from Diamond Spray Finish is a smart choice for homeowners in Canada. It’s good for your wallet and the planet. Cabinet refacing gives you a whole new look. It fits most budgets and eliminates the hassle of a major kitchen remodel.
It’s also good for the environment. Refinish wood cabinets cuts down landfill waste by up to 90%. Using local wood for refacing also reduces carbon emissions.
For selling your home, kitchen renovation projects are key. Neutral colors like white or soft grays attract buyers. In Canada, buyers in Ontario and Vancouver love kitchen upgrades with lasting finishes. A 2023 survey by American Wood Reface showed 89% of buyers prefer painted cabinets.
Doing it yourself can save up to 50% of what pros charge. Adding new hardware or countertops boosts your home’s look while saving money. Every dollar saved can go towards other home improvements, making refinishing a wise choice.
https://www.youtube.com/watch?v=tuWP1ozXNYs
Assessing Your Cabinets: Are They Good Candidates for Refinishing?
Before you start refinish wood cabinets, check their structure and materials. Look for solid wood frames and MDF cores. Avoid cabinets with warped edges or water damage.
Check for peeling veneer or deep scratches. Cabinets with sturdy hinges and working drawers are best for cabinet restoration.
Material matters: Solid wood holds paint/stain better than particleboard
Check for swelling, rot, or termite damage
Assess door alignment and drawer glide functionality
Most people keep cabinets with solid boxes—70% of refacing projects do. Veneer surfaces need gentle care to avoid peeling. Cabinets with strong joinery and no cracks are perfect.
Experts say check door profiles. Shaker or flat-panel styles work well with new finishes.
If surfaces have deep damage, get a contractor’s opinion. They help keep projects on budget. Focus on cabinets with solid frames. Even old styles can look new with the right finish. This saves time and money, unlike full kitchen remodels that cost $15k-$50k.
Essential Tools and Materials for a Professional-Looking Finish
Mastering kitchen cabinet refinishing starts with the right tools and materials. Whether tackling cabinet painting or cabinet staining, quality supplies are key. They ensure longevity and a polished look. Here’s what every DIYer needs.
Must-Have Tools for DIY Cabinet Refinishing
Orbital sander for smooth surfaces
5-in-1 paintbrushes and foam rollers for even application
P2 respirator and safety goggles for fume protection
Painter’s tape (3M brand recommended) for clean lines
For big projects, rent an HVLP sprayer from Rona or Home Depot. It speeds up work. Save money by buying second-hand sandpaper or reusing cloths for wiping surfaces.
Selecting the Right Paint or Stain
Choosing between cabinet painting or cabinet staining depends on your vision. Experts advise oil-based enamel for durability. But water-based options dry faster. For Canadian climates, choose moisture-resistant finishes like Benjamin Moore’s Aura line.
Trending hues include earthy neutrals and soft blues. Avoid dated orange finishes.
Primers, Sealers, and Topcoats Explained
Product
Purpose
Best For
Zinsser BIN primer
Blocks stains, seals wood
Old or dark cabinets
Minwax wood sealer
Protects wood grain
Staining projects
Varathane polyurethane
Protective topcoat
High-traffic kitchens
Always apply primer first. Skipping prep steps is a common complaint. Use satin sheen for hiding imperfections, not gloss. Wait 48-72 hours for full cure before reassembly to avoid peeling.
Preparation: The Secret to Successful Refinishing Kitchen Cabinets
Starting with careful preparation is key to fixing cabinets. It saves time and makes finishes last longer. A good plan helps avoid mistakes and can increase your home’s value by 70-80%.
https://www.youtube.com/watch?v=CATuNkdOBmw
Removing Hardware and Doors
Take off all cabinet hardware and doors. Label each piece with numbers or tape.
Use a magnetic tray to keep screws and hinges organized during cabinet hardware update projects.
Check if hinges are straight before putting them back. This avoids fixing them later.
Cleaning and Degreasing Surfaces
Grease can ruin new finishes. Clean cabinets with Krud Kutter degreaser, focusing on stove and sink areas. Use a microfiber cloth to wipe and let dry fully. For tough stains, apply Zinsser Cover Stain Blocking Primer before painting. This can add 10-15 years to your cabinets.
Sanding Techniques for Different Cabinet Materials
Change sandpaper grit for different cabinet types. Here’s a guide for cabinet sanding techniques:
Wood Type
Sandpaper Grit
Method
Oak
120-grit
Hand-sand to smooth open grain patterns
Maple
220-grit
Light power-sanding to preserve tight grain structure
Plywood
180-grit
Edge sanding to avoid veneer damage
After sanding, clean with tack cloth. Use a HEPA vacuum in small spaces for dust control. This helps the primer stick well to refinish wood cabinets.
Step-by-Step Refinishing Techniques for Different Cabinet Types
Learning kitchen cabinet refinishing means knowing how to work with different materials. Start with solid woods like oak or maple. Here, the grain is important. Use a gel-based stain for a natural look.
Before staining, sand with 220-grit sandpaper. This helps the stain soak in evenly.
Laminate or thermofoil cabinets need a different approach. Remove the old finish with a heat gun or chemical stripper. If panels are damaged, a glass shop can help.
After cleaning, apply a two-coat primer. This is key for woods like oak. Cabinet painting with latex paints is durable. Use foam rollers for smooth coats.
Pre-treat wood grain with wood filler for a seamless cabinet painting finish.
Use a satin finish paint for kitchens, chosen by 60% of homeowners for its durability.
Apply polyurethane on plywood cabinets to resist humidity, ideal for Canadian climates.
“Dress up an ordinary cabinet door with a painted pattern. First, paint the background, then layer designs with stencils or brushes.”
For distressed finishes, lightly sand after drying. This brings out the underlayers. In busy areas, choose paints that resist moisture.
Always wait 24 hours between coats. Adjust this for humidity levels. Good tools can cut redo rates by 40%. Invest in quality brushes and primers.
By following these steps, you can get a professional look. This boosts your home’s value without the cost of new cabinets.
Color Trends and Design Ideas for Canadian Kitchens
Canadian kitchens are now bold and timeless. Kitchen renovation and cabinet painting are affordable ways to upgrade. They let you show off your style.
Benjamin Moore’s Aegean Teal 2136-40 and soft whites like Cloud Cover are popular. They mix modern and traditional well. Color palettes like jewel tones and gray-greens make spaces inviting. Light neutrals help bring in more natural light in the north.
Popular Cabinet Colors in Canadian Homes
Color
Benefits
Example
Light Neutrals
Enhance space and light
Benjamin Moore’s Cloud Cover
Dark Hues
Hide dirt, add depth
Dark Charcoal with white accents
Two-Tones
Create visual interest
Navy blue uppers with white lowers
Two-Tone Cabinet Designs
Pair white cabinet painting with gray-green accents for a coastal vibe
Combine matte black hardware with espresso-stained lowers for contrast
Use Benjamin Moore’s 2022 Colour of the Year, Aegean Teal, on accent walls
Hardware Updates That Transform Your Look
“Polished nickel and black are the most popular hardware finish, hands down.” – Industry experts
Updating cabinet hardware update can change your kitchen’s look. Transitional-style hardware works well with Shaker doors. Matte black or brushed brass adds a modern touch.
Mixing metals like gold and bronze creates a layered look. For ease, consider touch-latch mechanisms from brands like Blumotion®.
Advanced Tips for Handling Problem Areas and Repairs
Kitchen renovations often have surprises. Issues like water stains or warped doors can grow if not fixed early. First, check how bad the damage is. Then, decide if you can fix it yourself or need a pro.
Fixing Damaged Wood SurfacesSmall scratches or dents can be fixed with wood filler and sandpaper. For bigger problems:
Apply epoxy or wood filler to cracks and let dry completely
Sand sanded areas smooth before priming
Use a 2-step process: lemon and kosher salt scrub followed by mineral oil for deep penetration
Old English Scratch Coat is good for visible flaws. For veneer peeling, use wood glue and press until it’s dry.
Solutions for Warped or Misaligned Doors
Warped cabinet doors can be fixed by adjusting moisture. Try:
Place a damp cloth over warped areas and weigh down with books
Heat with a hairdryers to relax wood fibers
Adjust European hinges using their 3-directional (in/out, up/down, side-to-side) settings
Loose joints can be fixed with wood glue. For stripped screw holes, use toothpicks dipped in glue for a quick fix.
When to Call a Professional
Big structural damage or cabinet restoration for big kitchens need pros. Pros cost $4,000-$9,500 for full refacing. Behr experts say hire pros for spray finishing: “Professional spraying reduces visible grain for smoother.
DIY refinishing is good for small repairs costing $50-$200. But, choose pros for:
Severe water damage behind sinks
Structural warping in drawer tracks
Matching original finishes in historic kitchens
Professional services cost $1,500-$10,000 for full kitchen makeovers. Regular care with wood conditioner helps avoid expensive fixes.
Maintaining Your Newly Refinished Cabinets
Keeping your cabinet maintenance up ensures your kitchen cabinet refinishing looks great for years. Stay away from harsh chemicals, as they cause 90% of damage. Use mild dish soap and water, and clean with soft cloths to avoid scratches.
“Sheen choices impact durability; higher sheen highlights wood grain but needs gentler cleaning,” advises the National Kitchen & Bath Association.
Wipe spills right away with a damp cloth; don’t soak surfaces.
Put up window treatments to block sunlight, which fades wood over time.
Use coasters under hot pans to prevent heat damage—60% of wear comes from stove proximity.
Check hinges and hardware every three months. Use touch-up markers for small scratches. Store leftover finish in a cool, dry spot for future touch-ups. Clean annually with a pH-neutral wood cleaner to add up to 50% to your cabinets’ life.
In Canada, homes deal with changing humidity. Run dehumidifiers in summer and use silicone sprays to seal joints in winter. Don’t stack heavy items, as they can warp your cabinets.
Regular care can make your cabinets last 5-10 years. Just follow these tips, and your kitchen will look great for years without needing expensive updates.
Common Mistakes to Avoid When Refinishing Kitchen Cabinets
Skipping important steps can mess up your kitchen cabinet project. Not preparing well, painting too fast, or not waiting for paint to dry are big mistakes. Experts say over 90% of paint fails because of bad prep. Here’s how to avoid these costly errors.
Rushing the Preparation Process
Cleaning and sanding are musts. Grease on 50% of surfaces can stop paint from sticking. Always clean with TSP and sand glossy parts lightly. Pro tip: Use 120-grit sandpaper for a smooth base before priming.
Don’t forget to remove hardware, fill dents, and clean each surface well.
Poor Paint Application Techniques
Overloading brushes causes drips and runs
Ignoring wood grain direction leaves brush marks
Skipping primers when dark-to light color changes leads to bleed-through
Latex-based paint is easier to clean up and dries faster. Paint thin layers with a natural bristle brush following the wood grain. Wait for each layer to dry before adding more.
Ignoring Drying and Curing Timelines
Be patient: let paint dry for at least 48 hours before putting things back together. Latex paint needs 7-10 days to fully cure. If it’s humid or cold, use fans to speed up drying.
Never stack painted doors on top of each other to avoid warping.
For top-notch results, follow these steps carefully. Don’t skip primers or rush prep. A well-done kitchen cabinet refinishing can increase your home’s value without the high cost of new cabinets. Make sure the paint is fully dry for lasting beauty and durability.
Transform Your Kitchen, Transform Your Home Experience
Refinishing kitchen cabinetsis more than a kitchen renovation. It’s a fresh start. Homeowners in Canada can make their kitchens look new for less than half the cost of replacing everything. This way, they save money and the planet by using what they already have.
Choosing dark colors or two-tone looks adds flair without making small kitchens feel cramped. Textured finishes also hide any flaws.
A new kitchen becomes the center of your home. It’s great for cozy winter nights or everyday meals. This update is quicker and cheaper than a full kitchen upgrade but looks just as good. Modern finishes like acrylic enamel are tough against spills and stains, making cabinets last longer.
Adding new lighting or open shelves can take your kitchen to the next level.
Doing this project makes you proud of your home. It shows that small changes can make a big difference. Whether you do it yourself or hire a pro, it improves your daily life and your home’s value. With a focus on being green and making things your own, now is the perfect time to start. Look at colors, book a meeting, or get sanding. Your new kitchen is waiting.
Choosing the right options turns a practical space into a place that sparks creativity. A kitchen renovation is more than just an update; it’s a new chapter.
The Psychology of Kitchen Cabinet Colors in Home Remodeling
When remodeling your home, the kitchen often serves as a focal point, making the choice of cabinet colors a crucial decision that impacts both aesthetics and ambiance. The psychology of color plays a significant role in setting the mood of the space, influencing emotions and even behavior. Warm hues like red, yellow, and terracotta can energize the kitchen, making it feel lively and inviting—perfect for social gatherings and family meals. Conversely, cooler shades like blue and green evoke a sense of calm and cleanliness, ideal for those who want a more serene and relaxing kitchen environment. Neutral tones such as white, gray, and beige remain popular choices due to their versatility, offering a timeless appeal that complements various home styles while making the space feel open and airy.
Beyond just the kitchen, cabinet colors should align with the overall aesthetic of your remodeled home to create a cohesive design. A modern home with sleek, minimalist elements may benefit from deep blues, charcoal grays, or crisp whites to enhance a contemporary feel. A farmhouse or rustic remodel, on the other hand, might be better suited to warm wood tones, muted greens, or creamy off-whites to create a cozy and welcoming atmosphere. Considering the psychological impact of colors when choosing kitchen cabinets ensures that your remodel not only looks stunning but also supports the desired mood and functionality of your living space.